Scheduling Appointments
Almost all academic advisors and student support services offer in-person appointments as well as virtual appointments. Your academic advisor will be in contact regarding how your appointment will take place. If you have any further questions about your appointment, please contact Jayhawk Academic Advising, or the person or office you are meeting with.
Navigate360 Student App
Appointment How To Video
Schedule an Appointment (via Navigate360 Student App)
After downloading the app, select “University of Kansas” as the institution. This should redirect you to the KU login page. Login with your KU Online ID and password. Each time you update your KU password, you will have to log in again to the app. The first time you log in, you will be asked a series of questions and then land on the main app screen. If you have a hold, the banner at the top of the screen will be red.
To make an appointment, click on the appointments button on the homepage. Then click on the "Schedule Appointment" button at the bottom of the screen.

Next, select what type of appointment you would like to make (academic advising), service type (reason for appointment), and preferred date.
 |  |
|---|
If you have multiple advisors at different locations, you will be able to select the advising office you need. If you do not have multiple advisors at multiple locations, the system will bypass this step.
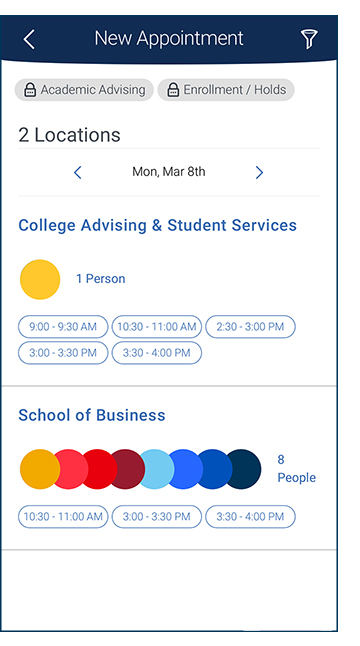
Based on the date you select, available appointment times will appear from that date forward. Click on a specific time you would like to meet. If you have multiple advisors at one location, you can filter by individual advisor if you click on "View individual availabilities."

This brings up a confirmation page with appointment details. Review the details, select the type of reminder you want, then scroll down,
 |  |
 |
|---|
Canceling an Appointment (via Navigate360 Student App)
To cancel an appointment using the Navigate 360 Student app, first go to your list of upcoming appointments. Click on the appointment you wish to cancel. This will bring you to an appointment details page. Scroll to the bottom of the appointment details page and click on ‘Cancel Appointment.’
Select the reason for canceling the appointment. You can also add any additional comments about why you are canceling if needed. Click on the ‘Cancel appointment’ button to confirm cancellation. After canceling, you will be redirected to a confirmation page. If you wish to reschedule, click the button at the bottom of the page.
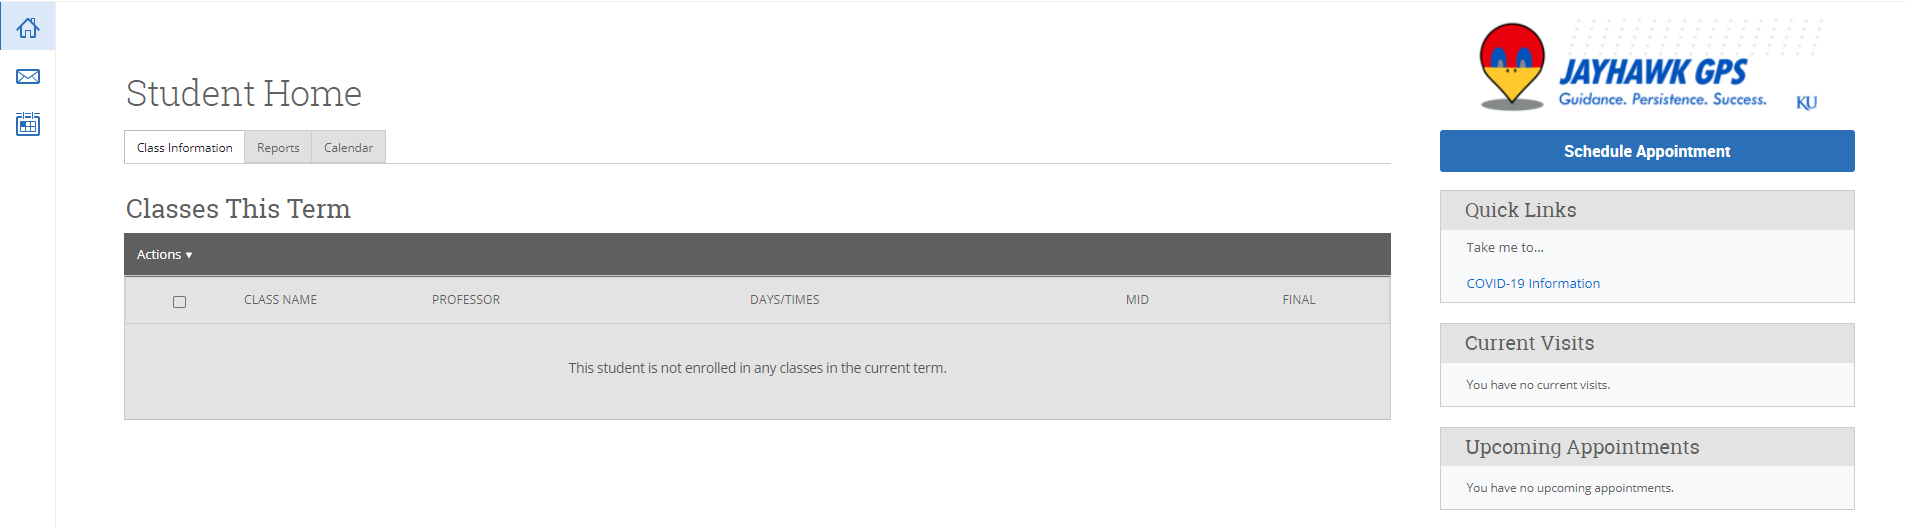
Jayhawk GPS Web Platform
Appointment How To Video
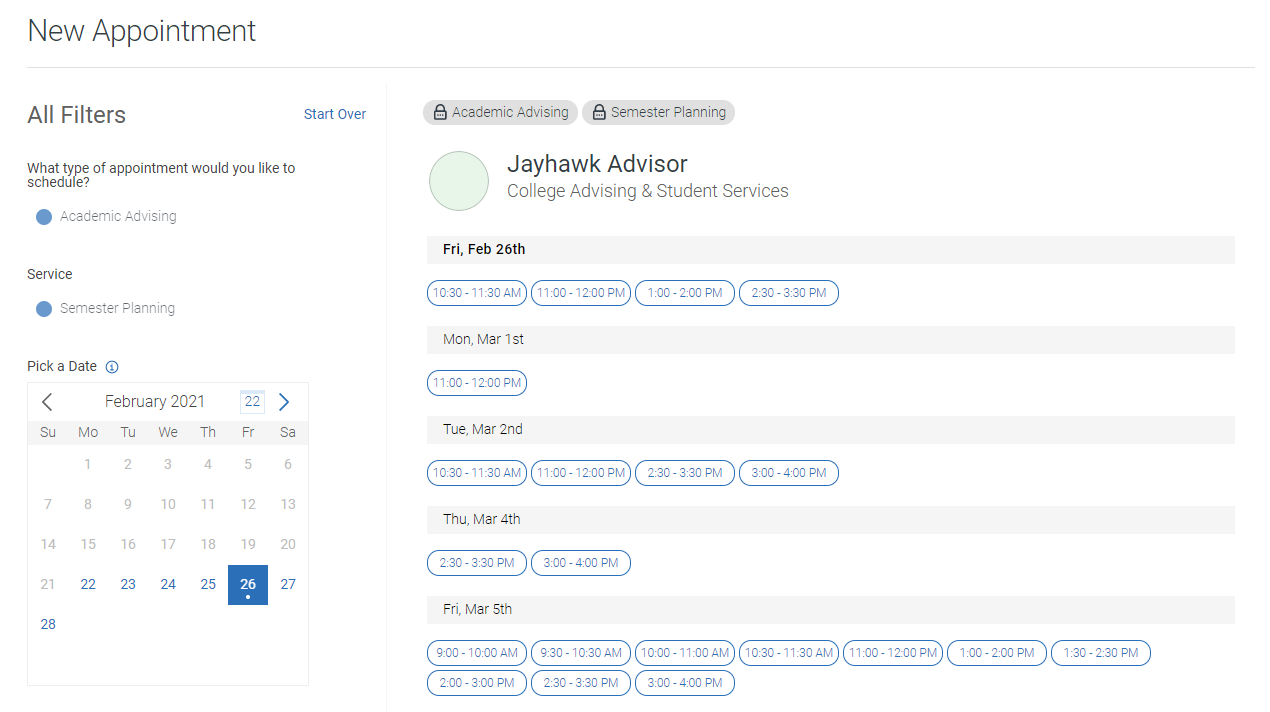
Schedule an Appointment (via Web Platform)
Scheduling an appointment with an advisor using the Navigate360 web app is straightforward and painless. Start by clicking on the "Schedule Appointment" button on the right side of the dashboard.
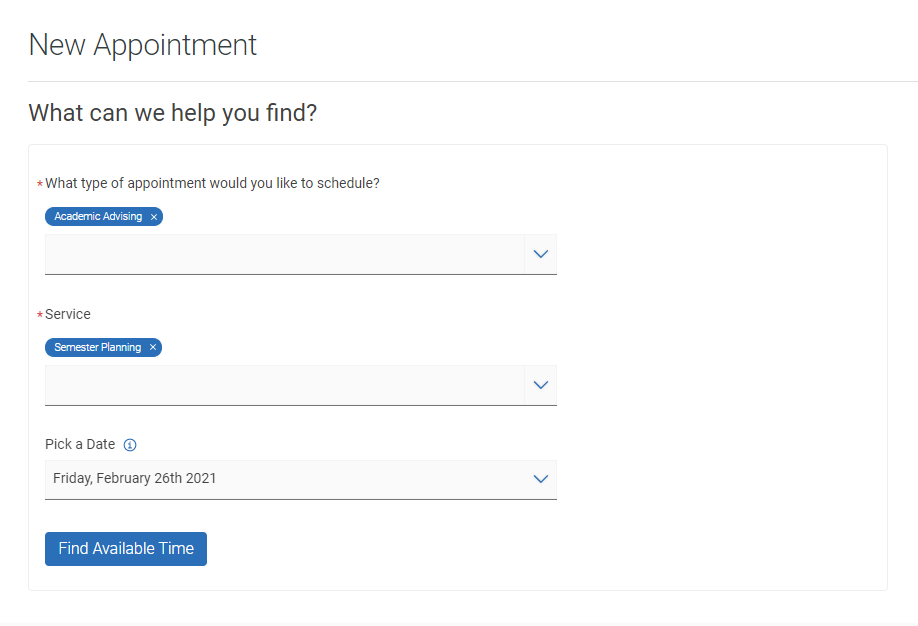
Select the appointment type you need (i.e. Academic Advising). Next, choose your service type (the reason you want to meet with an advisor).
Finally, select your preferred date. The system will look for available times from the date you select and onward.
The system automatically shows which day(s) and time(s) the advisor is able to meet with you. On the right-side of the screen you will see a list of specific dates and times. Click on the time you would like to meet with your advisor to select an appointment slot.
If you are unable to find a date and time that works for you, please reference the calendar on the left side of the page. If a dot appears underneath the date, there are appointments available on that day. Click on the date(s) to view more appointment times.
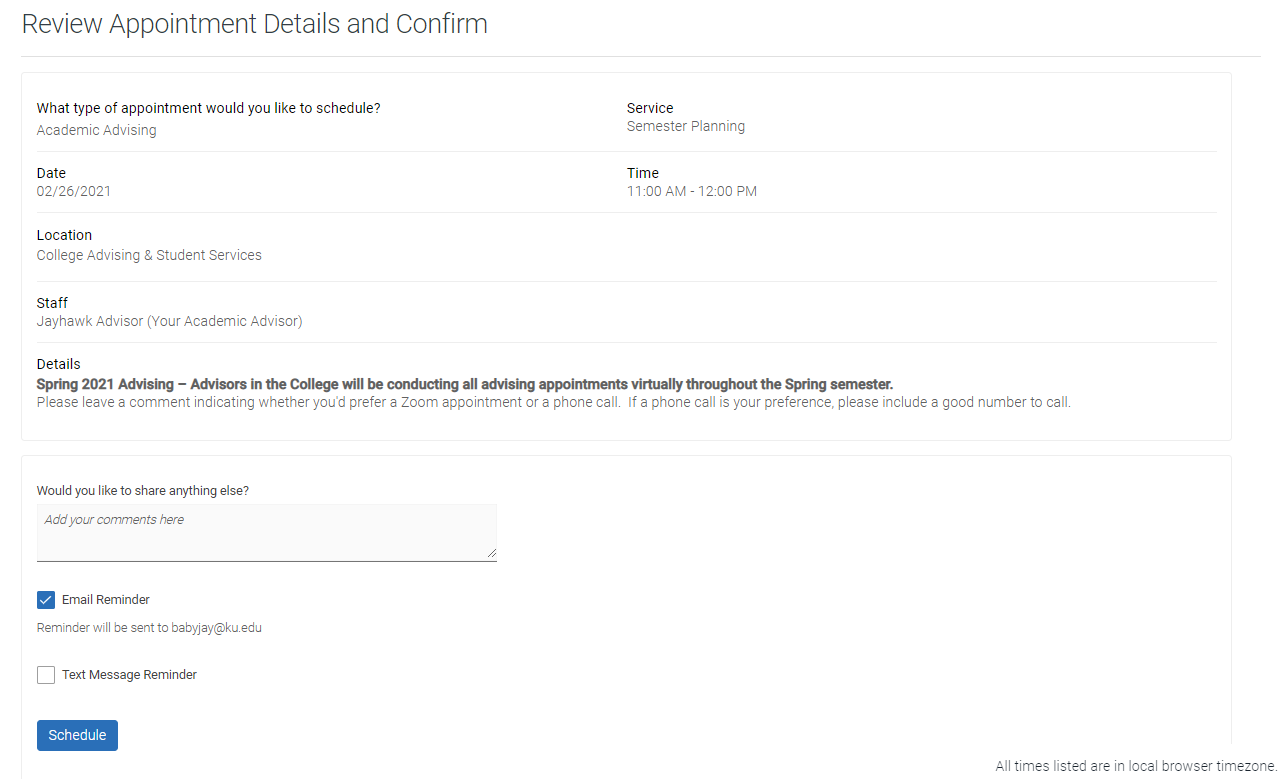
This screen allows you to review the details of the appointment and add any additional comments you would like your advisor to be aware of beforehand. Make sure to click on “Schedule,” to finish scheduling. After clicking on “Schedule” both you and your advisor will receive a confirmation email to your respective KU email addresses.
You will receive a confirmation screen when your appointment is successfully scheduled.
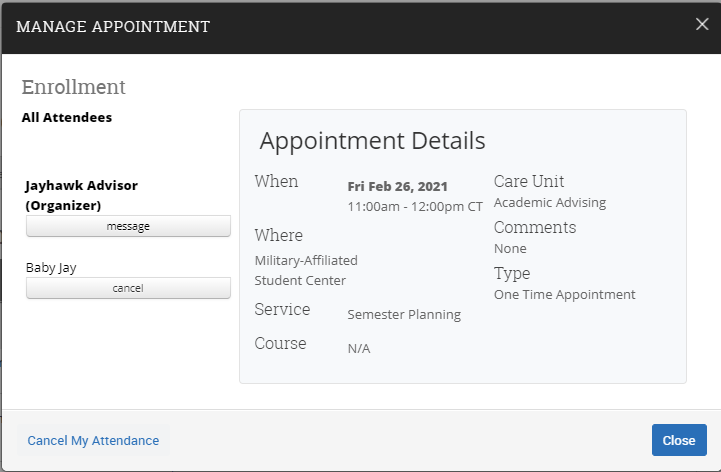
Canceling An Appointment
To cancel an appointment using the Navigate360 web app, open the appointment details by clicking on the appointment under "Upcoming Appointments" from the home screen.

This opens appointment details. Click on "Cancel My Attendance", select a reason to cancel, and then be sure to click "Mark as Cancelled".